I’ve recently purchased the GL.iNet GL-AR750S-Ext travel router, also known as Slate, and I’m so far quite pleased with it. With this handy travel router running a custom interface over OpenWRT I was easily able to configure a plug-and-play VPN solution that allows me to connect to my network at home. Now I can watch Netflix, use remote desktop, browse the web safely, and avoid triggering security measures that may lock you out of your account while traveling abroad.
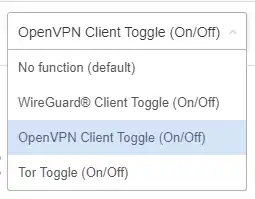
Conveniently, this travel router also includes a configurable switch on the side which allows me to quickly enable and disable the VPN connection. By configurable, I mean that this switch allows you to choose whether it toggles the OpenVPN, WireGuard, or Tor connection.
At home I use an Asus RT-AC66U-B1, but your setup will likely be very similar. Most Asus products use similar firmware and OpenVPN support is becoming a more common feature among base model routers without splurging on enthusiast-grade hardware. The Asus RT-AC66U-B1 is an older bit of kit, and it has its quirks, but it’s still supported by Asus and runs about $110.
Warning: before enabling any web-facing features on your router, you should always manually check that you have the latest firmware installed.
To begin setup, I simply browsed to the VPN page of my router at home, for me that’s 192.168.1.1. If you’re unsure of your gateway’s address, you can open Powershell and type ipconfig then browse to the address next to “Default Gateway”. Then I clicked on the VPN tab under “Advanced Settings”, made sure that I was on the “VPN Server” tab, and clicked the “OpenVPN” toggle on the right side of the page.
From this page, I toggled on “Enable OpenVPN Server” and then changed the field “Client will use VPN to access” to “Internet and local network”. This will not only allow me to connect to the network at home, but also to browse the web from my internet connection at home. Without this option enabled, I would only be able to interact with devices on the network but not browse the internet as if I’m sitting at home.
Then add details for a new vpn user, click the plus symbol to save the new user, and finally click “Apply”. After your router updates the settings and restarts, return to the OpenVPN tab to verify your settings and export an OpenVPN configuration file. This is the file which you will import into your OpenVPN client on your phone, computer, or travel router in order to connect to your OpenVPN server.
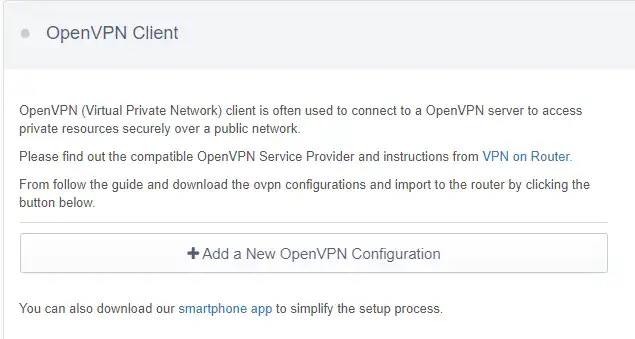
Now on your travel router, click the VPN dropdown and select “OpenVPN Client” and click the giant button to upload your OpenVPN configuration file.
Now simply enter your username and password and click connect. You’ll now be connected and able to use your home’s internet and local network connections.